


Is there a worse feeling as a creative business owner than checking your inbox to see that someone reached out to you months ago about working together and you never responded?
You’ve been marketing your ass off to get people in the door and hearing crickets. Turns out, people were coming your way, they just got buried in your inbox and now it’s been too long to follow up.
One of the most transformative things I’ve done in my business has been automating my inquiry process with HoneyBook. Taking 30 minutes to set up an intentional automated response to leads who use my contact form has made me $1000s since I implemented it last spring. HOW?!?! It gets my leads in the room with me ASAP so we can connect and I can convert them into paying clients without all the pesky back and forth and waiting around.
It’s time to eliminate that experience from your biz for good and convert leads like crazy without being in your inbox at all hours day and night.
Here’s just a taste of what you’re able to do once you get the inquiry process dialed in as a creative entrepreneur:
😍 Get back to leads quickly so they’re less likely to reach out to a competitor or forget they reached out to you in the first place.
😍 Give them direct next steps on how to get the ball rolling on working with you and feel like you all are already getting started together.
😍 Provide a seamless and easy client experience that speaks volumes about your professionalism and trustworthiness to wow them without lifting a finger.
Keep scrolling for my ✨exact✨ guide to create an inquiry funnel that lands more leads instead of letting inquiries gather dust in your inbox.
Step 1: Make sure you have a HoneyBook contact form on your website
If you don’t already have a HoneyBook contact form on your website, you’ll want to head to the “Contact Form” tab and recreate your website’s contact for there. Then, follow the instructions for your website builder to embed the form.
Don’t have a website? Create a lead form instead for a URL you can use in your link in bio or share with leads to get them in this workflow and take advantage of this game-changing automation!
Don’t have a client management system (CMS) at all? We’re gonna have to change that – here’s 50% off your first year of HoneyBook to start managing clients with ease. After you sign up, come back here and use this to start optimizing HoneyBook for your creative biz!
Step 2: Navigate to the “Automations” page
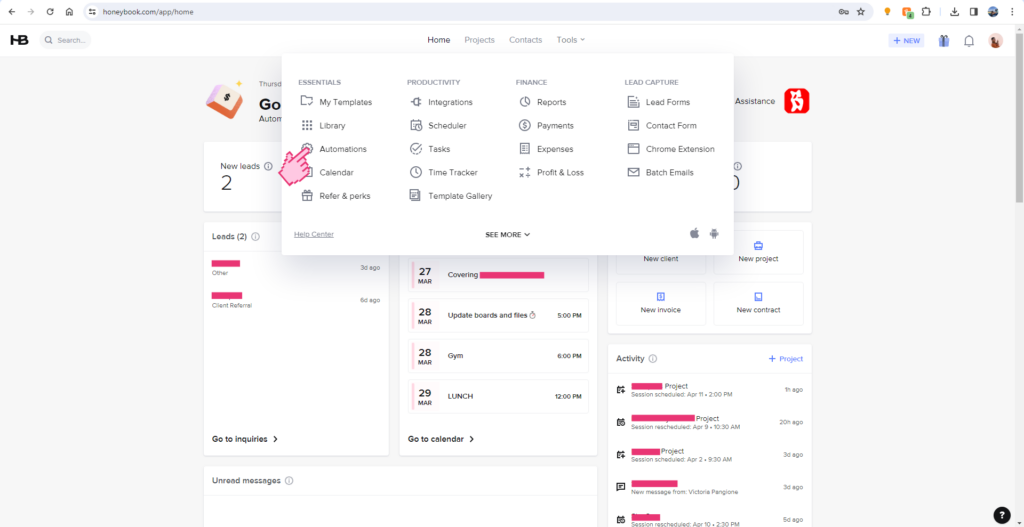
Once you log into HoneyBook, head to the “Automations” tab under “Tools.”
Step 3: Create a new automation
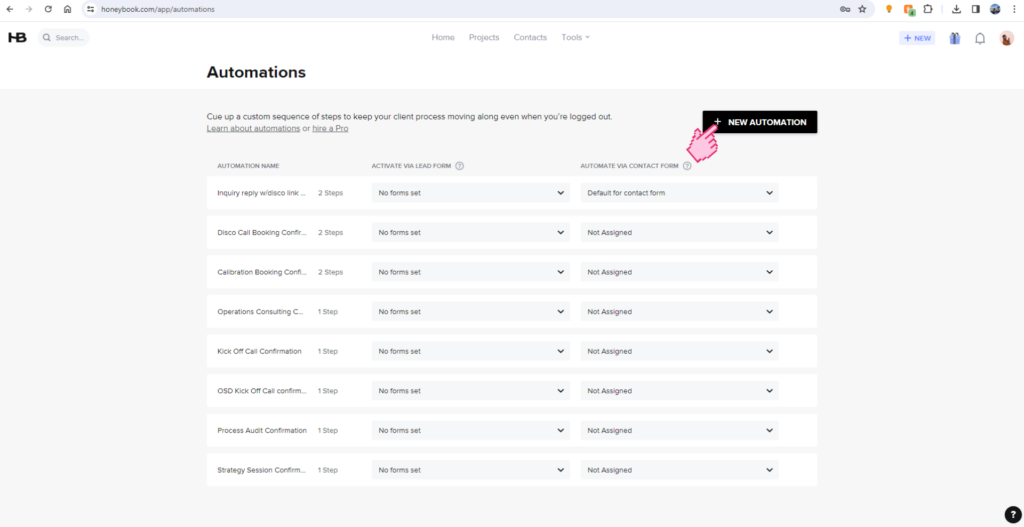
Click the “New Automation” button in the upper right-hand corner of the screen.
Step 4: Choose your action
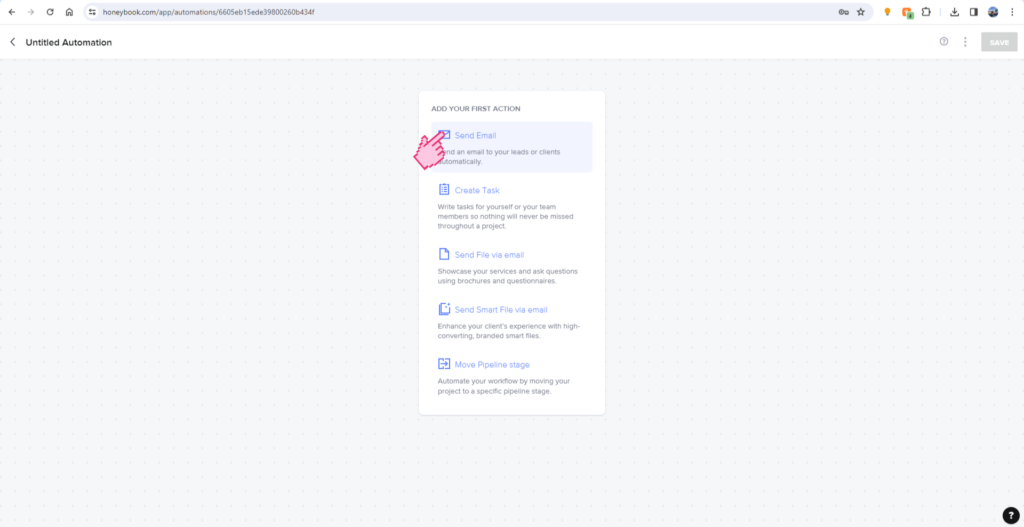
First things first, select “Send Email” as your first action. This is the first thing that will happen when someone hits “Submit” on your contact form. We’ll cover connecting this automation to your contact form in a few more steps.
Step 5: Writing the response email
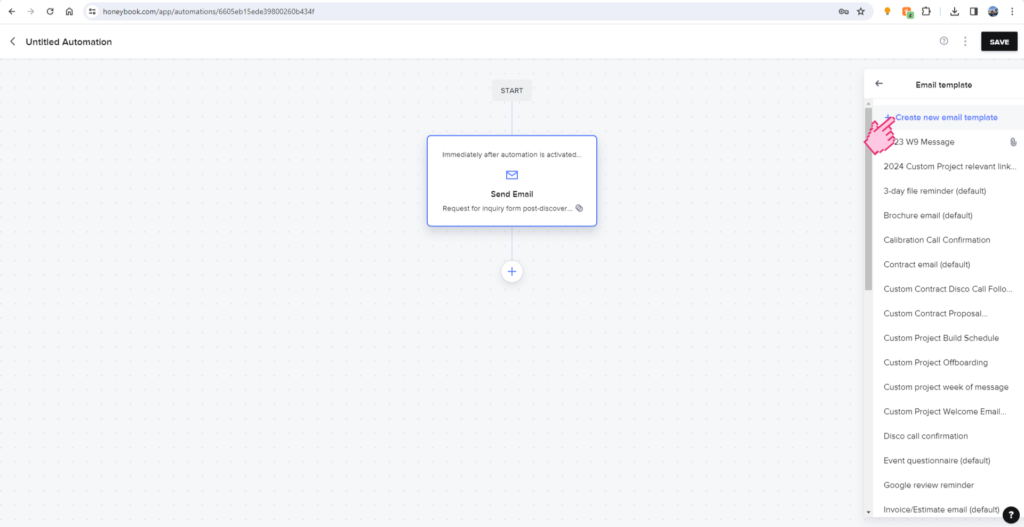
Use the menu on the right-hand side to create a new email template.
Step 6: What to include in your automated email response
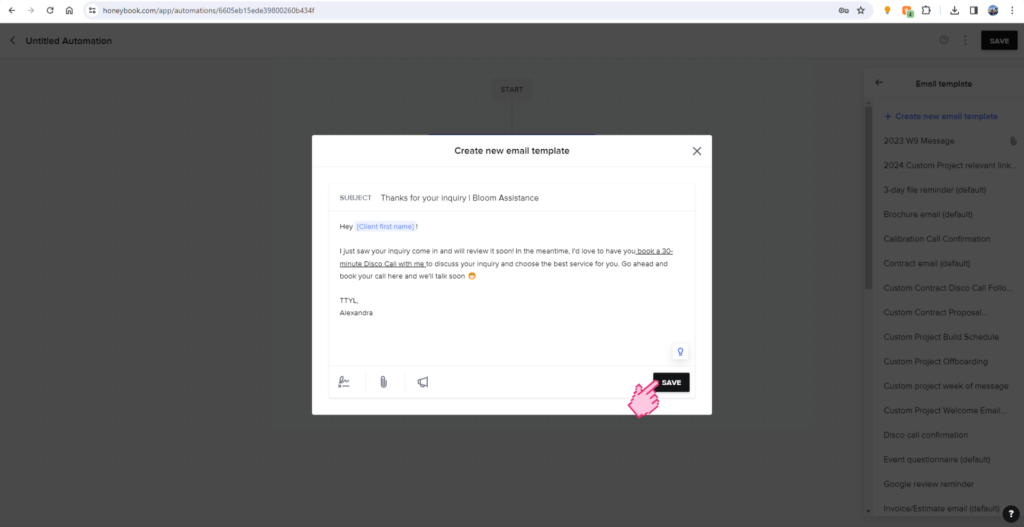
This is where you write the email your leads will get immediately after submitting a response via your contact form. Whatever you put in this email should be exactly what you want a lead to do after they reach out to you. If you were getting back to them manually, what would you say?
If you’re a service-based creative, chances are it would be something like “Thanks so much for reaching out. I’d love to hear more about what you’re looking for, let’s hop on a call to see if we’re a good fit.” If you don’t immediately want them to book a call with you, include whatever helps them continue to engage with your brand until you’re ready to get back to them manually, if needed.
The two most important parts of this message are:
A.) Making it sound like you. This is not the time to be unusually formal. While we love automated messaging at Bloom Assistance, sounding like a robot is never hot. Write this message just like you would normally. The only difference is we want to be especially strategic about the best info to share with your lead at this part of the inquiry process, which leads me to point B;
B.) Including a clear call to action and link to their next step. Whether you want them to book a call, submit a secondary form or review service details, make sure you tell them that in this message and make it super easy for them to do so.
Once you’ve crafted the perfect response to anyone who fills out your contact form, remember to hit “Save” in the lower right-hand corner to save your gorgeous new email.
Step 7: Set up a scheduling link in HoneyBook if you don’t already have one (skip if you have a booking link)
If you’re still going back and forth with people to find a good time for a consultation call, this is the time to upgrade. Make it easy to get on your calendar with a simple scheduling link, that way your leads can choose a time that works for both of you without asking for your availability.
Head to the “Scheduler” tab under the “Tools” menu and use the options to create a scheduling tool that matches your meeting length, availability and scheduling permissions.
Then, go to your “Company Settings” and use the “Integrations” tab on the left-side menu to connect Google Calendar to your HoneyBook account, That way, your availability will change to match whatever’s on your calendar so you don’t get double booked.
Step 8: Connecting your email response to your contact form
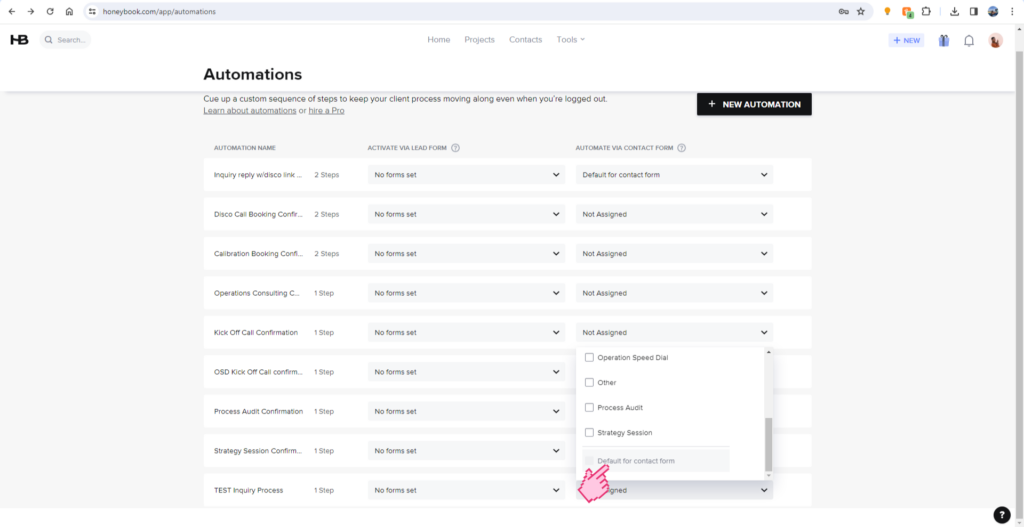
After you’ve saved your automation with the final “Save” button in the upper right-hand corner of the screen, you’ll have to connect it to your contact form (or lead form) for it to start triggering for new inquiries.
Head back to the “Automations” page, find the automation you just set up and click the dropdown menu on the right side of that automation. Then, you get to choose which service type you want the automation to trigger for OR make it the default, so anyone who submits the form gets the same response, regardless of what service they want.
Now you’re thinking, “Wait! If I make different automations based on the service the person is interested in, should I create more automations tailored to those services?” and the answer is YES.
If your inquiry process looks different for different services, use automations to create more customized funnels for your leads to make sure you’re giving them the right info for the service they want.
This set up takes about 30 – 60 minutes, but it will save you HOURS of chasing leads and going back and forth to schedule consultations. As long as your booking link availability is accurate and changes automatically with your normal schedule, this workflow won’t need any maintenance on your part.
Oh, and if you’re holding back on setting this up because you think it’s too expensive, I want you to think of what it costs you not to respond to leads who want to work with you because their messages get buried in your inbox. That number is almost definitely in the thousands and a HoneyBook membership is under $400/yr. And to make things even sweeter, here’s where you can score 50% off your first year of HoneyBook on me!

View comments
+ Leave a comment